Showing posts with label mixed media. Show all posts

Saturday, July 4, 2015

I finished my postcards

So happy that I got my cards out in the mail today.  As usual, I am late but better late than never! 


This didn't photograph well but I wanted to get it in the envie so didn't retake it.

I really quite like this blue flower with the needle-felted and bead embellished centre.

Monday, December 1, 2014

Making Postcards for a swap


I'm making postcards again! I have just received my list of ten recipient addresses from Hanna Andersson via the iHanna Postcard Swap!  Love this swap and I almost made all my cards before the due date.  So again, I will be slightly late but all of my cards should be out in the mail this week.

I start this card with a simple drawing on vintage paper from music sheets and dictionary pages.  I had an inkling of an idea and wasn't sure if it would pan out.  I'm quite happy with this one.  I posted it on a FB group that I am on with and a woman commented on how she collected "pear" art so I sent this one out in the mail to her. I hope Susan likes it as much in person as she did from this picture.


This next postcard is still with me.  I haven't quite decided if I will just keep it our mail it out in my next swap.  I like the addition of the tree bark against the backdrop of vintage paper and watercolour. I call it "Sunrise over Lake Simcoe".  The lake is only a few miles from my home and I love going there especially in the morning to see the sunrise.

I really like the juxtaposition of elements in this card: the corrugated cardboard from a hot coffee sleeve and the bark beside the music notes and text page.


This next card is an acrylic painting of a book cover.  I didn't really much like the result so I have made it a mixed media postcard using gel pen for the sun over the wheat field and inked up bubble wrap for the orange morning sky.


I am not sure why I haven't mailed this one out either and I might as well for the next swap.

Monday, July 21, 2014

Attempting

Trying to add a post on my iPhone! and I did it, well I added the picture!  I created this piece as part of the Index Card a Day FB group!  It was an experiment gone awry!  The waves and the scribble lines were done with gesso and I rubbed dioxin purple acrylic paint on with a baby wipe.  I thought that I could get the gesso to act more like a resist but it didn't happen.  Possibly I picked the wrong pigment and might try this one again.


Instead of throwing the card out I decided to act stuff to make is presentable.  I cut out the butterfly images from an end roll of wrapping paper.  Then doodles all over the card with gel pens.  I used glitter, neon, and soufflĂ© Sakura pens. I like this card now, it was fun!

- Posted using BlogPress from my iPhone

Sunday, December 8, 2013

Do You Have a Blog?

I was asked via e-mail by a friend from Australia if I had a blog.  I have replied to her e-mail but I didn't mention this blog.  Okay so I do have a blog but seemingly I am not a blogger with any sort of stamina.  I find Instagram, Flickr and Facebook quick and easy (well that is a bit of a fib).  However, I can surf through these platforms on my phone; it isn't so easy posting to blogger using a hand-held device.  So, I just kind of got out of the habit.

Anyway, this post is for you Carol!  I just participated in a postcard swap with Hanna Andersson from and we were to post our blog addresses.  Felt a bit weird submitting my blog address after I checked some of the blogs of the swappers that sent me cards - they are avid bloggers.  As I have said, me…not so much.

It seems strange but I retired from work in May of this year and I should have loads of time to put into this blog.  Not true!  It is a conscious decision on my part to not blog really.  I tell everyone that I am as busy as I have always been and finding the time to blog just doesn't make it to the horizon.

So, I have been doing some different artistic endeavours and I think that I will pick up the gauntlet and give this thing another whirl.

I took an on-line experimental art course (if I could figure out how to put her badge/icon/thingie here I would but I don't find blogger easy) that I thoroughly enjoyed.  She is a fab artist from the UK and her name is Amelia Critchlow.  I now have a cool new mixed media avatar that I can use.

This is the first pencil selfie I have ever done and I enjoyed the process.  I especially like the hair although this was not required for that segment of the course.  I love the colour purple and so just started cutting shapes from a magazine.  Although I don't have purple hair, I added the grey shapes to indicate that I do have them.  I like the effect.  It is more representative of what my messy curly hair looks like in real life so I much prefer this to a Bitstrips cartoon!  I added some Derwent Inktense to cheeks and lips to add a bit more colour.

Sunday, April 28, 2013

Thank you card!

I couldn't believe it when a few days ago I received a letter in the mail and was the very happy recipient of a thank you piece of art.  The sender was the recipient of my 4 X 6 postcard exchange that I did through the Sketchbook Project.  How nice was that!!!  Her is Rachel's watercolour and graphite postcard drawing!  Isn't it lovely!!


I am very happy with my progress on my postcards for the swap.  I have finally completed the blue prototype and have to just find some creative lettering that I like to add my message to the front.


I would like to find more washi tape around but decided to use what I have although I don't really think it "goes" that well.  But really it will have to do as it is all that I have on hand in this colour and I might as well use it up.

The one thing that I learned from finishing this one is that I have to move the beads up more.  I ended up having to cover the ones at the end with the washi tape.  Bummer!  That is the reason that I do a prototype.  I am just not a very good designer/planner in my head; I have to use my hands and make one to find the flaws or make any changes that I think would look better.

I also decided that I didn't like putting the beads in the flower centres because there really wasn't enough symmetry for me.  I decided to move them to in-between the hand stitched crochet cotton which makes a clear and clean line.


With the photo above, I just wanted to show that I painted a piece of cheap paper with the peach colour in the ribbon and then stitched the beads on.  The soft gel was used as an adhesive and the ribbon attached to the postcard.  Then the washi tape was added for the final touch before the writing.

Wednesday, April 24, 2013

Postcard Swap-Prototypes


I thought I should show what I mean by junk mail postcards.  Here is one that I received in the mail last week.  I can recycle them in the bin or I can use them in my art.  And I am using an iTunes card to apply the first layer; gesso!


I
Here is the finished prototype in pink!  Now I just need to check the internet and come up with some creative lettering for my message!  I don't have enough of the deep pink ribbon so I will have to make do with blue.


In the photo below, I am stitching the ribbon to a piece of paper that has been painted a peach colour.  As the photo above shows, I stamped this postcard using the same stamp but some different ink.  This time I used Staz On ink pad.  The Staz On ink will go on "anything" and it actually does STAY ON!!


The thread I am using is actually crochet cotton that I got at a charity shop.  I think it works well. 

Tuesday, April 23, 2013

Postcard Swap #4 Prototype

I think that I have got my next batch of postcards are all figured out.  I made up a prototype and I think it will do just fine.  I thought that I would change it up and not use my felting technique although it is still my very favourite!


I hand stitched the two pieces of organza together.  Then, I applied some acrylic paint on to some paper and it is the backing for the hand-beaded organza ribbon strip and adhered them together with soft gel medium.


I then applied a layer of pan pastels and covered it using my homemade stamp (yes, it is the erasure that you can get from the dollar stores) with pigment ink.   I made a pattern on the other side that I have used quite a few times but had not used this side yet.  Next was a wash of thinned down gesso; not too much just enough to lighten the stamp images.  I might even have to lighten it up a bit more.  For this prototype, I think that I will just have to use different ink to but on my letters and words, my message so to speak.

There is only one problem, I don't have enough ribbon to complete the 10 postcards.  So I guess I will have to figure out something else for the last few cards. The real issue here is; I don't want to buy anything else.

The last two stages are apply purchased washi tape and my message!  

Tuesday, April 9, 2013

Mixed Media Collage and Prototypes

I  have signed up to participate in another The Sketchbook Project challenge and I can't wait to receive my 4 X 4 canvas to paint.  I haven't decided if I will actually "paint" it per se or if I will make my painting a collage.

I have a bunch of old dress patterns "from back in the day" when I sewed more.  I got the inspiration to do this from a fellow Instagramer.  She was using the packaging in her altered collaged journal pages. My IG friend Carol had some real "vintage" dress patterns from 1950's that were really cool.   Since my patterns are not old enough to be cool, I decided that I would try and use the dress pattern  tissue in a collage.


I really like the effect and I am seriously considering using the technique for the 4 X 4 painting challenge. I found some tissue tape that I had purchased at a local art supply in the sale bin.  The reason it was in the sale bin is because the glue was dry so I just tore off what I could and applied it. 


I like the idea of adding text, of having something to say in my journal page.  I have to remind myself that it is okay to play like a child.  We have to remind ourselves that children live their lives "in the NOW" all of the time.   I think we need to return to that.  I think it makes it easier for me to make art when I get myself into this "childhood memories" zone.

What I used to make these:

-recycled paper substrate (from the recycle bin at work)
-recycled dress pattern tissue applied with soft gel medium
-stencil that I had purchased some time ago and never used
-wooden puzzle piece
-magazine page cut out using paper punch from dollar store
-recycled foil gum wrapper dot applied
-Text (in a different language ) applied using Magic tape from a cookbook  to make "artist" tape
-Micron pen and coptic pen
-oil pastel for smudging

I am planning on joining another postcard swap this month with Shannon Ganshorn and I think that I will use this as part of this next swap.


Saturday, March 23, 2013

Another Postcard swap

I am about ready to send out my latest postcard swap.  This postcard was made for a friend who has cancer.  It wasn't meant to be so "pink" specifically, it was just what I had "on hand" at the time.


What I had on hand is a bit of this and a bit of that.  There is a recycled paint chip on the bottom edge of the card, a bingo card at the right side, and some magazine images and text for old magazines.  I liked adding the page from an old book and used some paint to colour it up a bit.  I added some organza to the card because I just love the tactile nature of fabric.  I used purchased cut out stamps for some of the embellishment; the plain circles and flowers.

Tuesday, February 26, 2013

Green postcard - What was I thinking?!

I an beginning to get very nice messages from my fellow participants in the postcard swap; I had asked that my recipients let me know when they received my cards. I always wonder if they make their way and I am glad to get nice e-mails from my fellow swappers.

I should have posted this earlier but I simply forgot, so I thought I would rectify that today!  Hmmmm, I'm just finding out it isn't so easy as I thought on mu iPad.  I need to work on this a bit and figure stuff out. I guess I'll have to drag out my laptop to finish this post.

I thought I had taken lots of photographs of the postcards that I made and it would appear I was very much mistaken.

Bummer!


In this snap, I am just needle felting the roving to the organza.  The addition of glass bead embellishments will be the next step.


Saturday, February 16, 2013

Handmade eraser Stamp

I am hoping that you noticed the wonky marks on the handmade artist tape that surrounded the postcards.


I used a cheap white eraser from the dollar store to make this one. They come in a package of four usually so they are extremely economical! 

It was really fun to make and although you can't see it there is a different pattern on the opposite side"


Friday, February 15, 2013

Music and more about Postcard Swap V.3

I love to listen to music when I am creating my art and I came across this woman sometime ago from another artists blog.  So here I am.....I am sharing the beautiful voice of this woman too.  I don't use this video, I just went to iTunes and purchased several of her songs to appealed to me.  Again, perfect music for making art; well, for me that is.


My next favourite song is Nadir (Synchronicity) and then Forrest Veil.


 I must admit up front that visually posting these photo's of my art here, I find these postcards a bit too "hot",  too visually over-the-top.  However, in real life my eyes didn't see it that way at all.  So, I will of course all be in the eye of the beholder.  I hope everyone who receives them thinks so too.


The organza is a bit difficult to photograph because of the the nature of the fibre; the glare effects that it creates with the lens of the camera.


 I don't know how the flower motif was created really, it just sort of "happened"! I really liked it.


I photographed this one sitting on it's envelope.


Here are the envelopes all in a nice neat pile!  All ready for mailing!  I hope to be able to get to the post office today to do just that.  I hope all of my participants will forgive me but between work (today is my one day off for this week) and the stormy weather, I haven't been able to get there.


This is my constant lament though so bear with me for the next challenge!  At least I hope that Shannon is willing to host another challenge.  I love to participate but I am somewhat of a procrastinator and then of course I never chose something that is easy peasy either.

These are time consuming because I have to make everything from scratch, right down to the hand made "artist tape"that is the finishing touch.  I don't have a cookie cutter process and probably never will because I would get bored doing that.

I am really glad to be able to re-cycle my drop sheets from other projects.  I had figured that I would have to put them in the burn pile since I had hung on to them way too long.  So, I hope everyone does appreciate the colour if not the oddity of the craft!!

Wednesday, February 13, 2013

Two of Hearts and Postcards

A few months ago, I joined the 3rd International Postcard challenged hosted by a Canadian woman from British Columbia.  She does a fabulous job of hosting the challenge!  In fact, I am beginning to receive my postcards in the mail!  So thrilling!  I have had to send mine out late once again but with working and snow storms...I wasn't able to get them mailed out on time.  However, I am a firm believer that late is better than never.  One of my cards will be going all the way to Australia!

I made this years postcards completely using some hand needle-felting on organza.  I hope the recipients will enjoy the tactile nature of the cards.

I thought that I should post about Valentines Day tomorrow!  After I finished the postcards for the International Postcard challenge I began working on something for Valentine's Day.  Just something simple again but with the theme of "two hearts beating as one".


I thought that I would show the "needle" that is used to force the wool roving into the organza fibres.  I also decided that I would use some beads as an embellishment.  Not too much, just a few well placed ones.  I could actually re-do this photo so you can see the beads but I just don't have the time.  I think the glare can be overcome enough that the beads are visible.


I need to continue working on my camera skills and I have added this on to my "50 things" to do list.  It is a challenge that I joined via the Art House Co-op, and the Sketchbook Challenge.  Currently, I am at number 33 on my list of things that I want to do in the coming year. I have to submit my "50 Things" by February 22, 2013.

This means that one of the items on my list are getting things done early or ON TIME!!
Sunday, November 25, 2012

Proto-types and Inktense fun!

I forgot to post the pencil drawing prototype to my perfume bottle below!  Bummer!  Afterwards, I realized that I had not measured the bottle properly;  the size of the upper glass piece and the lid size is off enough that it looks like a hat!


I still have a fondness for the glorious pencil!  There is nothing like it really: simple, easy to use, no need for a lot of expensive extra's.  The most expensive thing about this form of art is your paper or sketchbook!  At least my final coloured drawing has much better proportions.

I had time to enjoy a "play day" several days ago!  I love getting my hands dirty from using art materials.  In this case gesso and Inktense blocks.

 I really like these blocks because once the water dries the colour is permanent. It is permanent because it is "ink"!
I should have purchased the larger size but I didn't have the cash at the time!  So if you are thinking about going out to make the purchase...if you can afford it I highly recommend that you purchase the extra colours in the 24 pack.


I am using an old coffee table book purchased at a charity shop.  It is cloth-bound and has sewn signatures.  I ripped out some of the pages to make room for collage fodder.  On this page I slapped on some CHEAP gesso to cover up most of the photographs and printing on the page.  Then, I rubbed the Inktense colour blocks down randomly on the page.   As you can see, I broke some up to the size I wanted.  Once that was done that, I dipped a wide brush in water and slapped in on to spread the colour.  There was so much water that I let some of drip down the page.  

Bottom line, I had fun!  Not too sure where I am going with this yet but I do like it.

Monday, July 30, 2012

More Postcards

I found two more postcards photo's...although I still don't have all of them.  Oh well, such is life!  I just received another comment from one of the recipients of the swap and I think that I enjoy getting the comments in my e-mail box as much as receiving the postcards.  Well, I shouldn't go that far, I really do love receiving the mail better!  Now, there is nothing much in the mailbox but boring nasty bills and junk flyers.


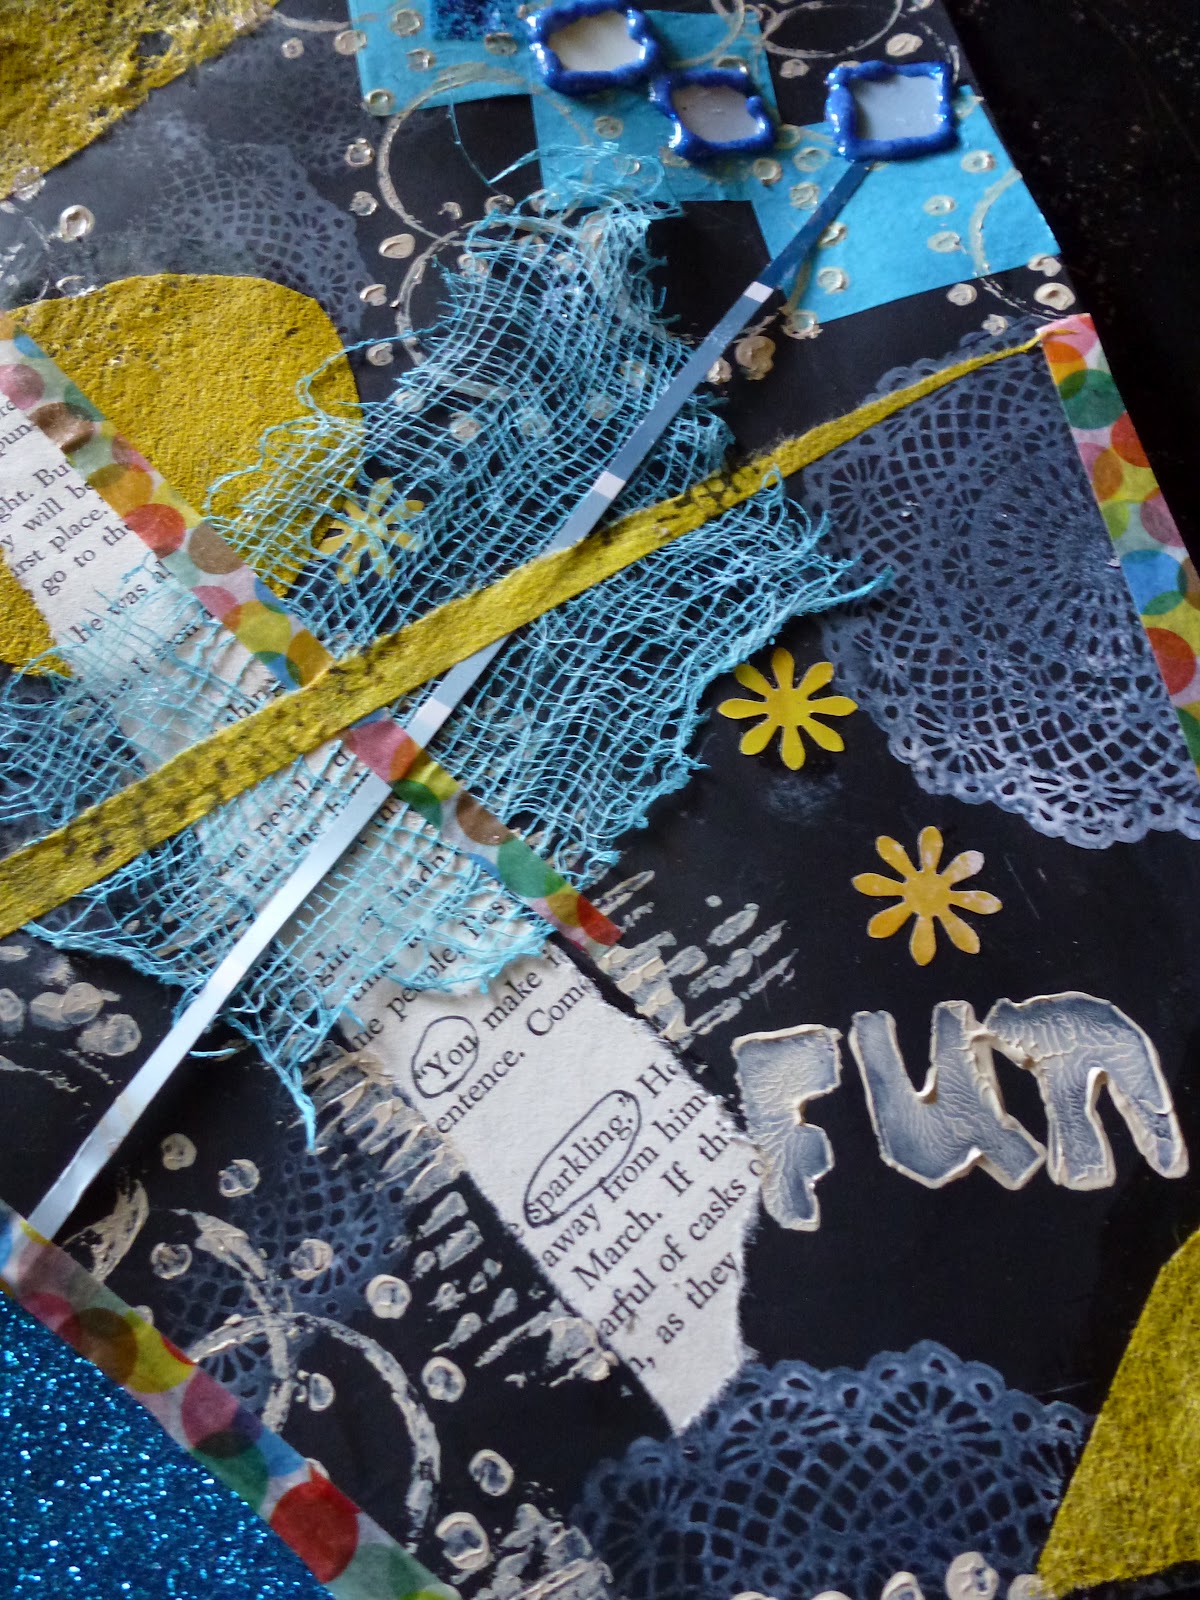
As below, I used many of the same elements except that on this piece I added dyed household cheesecloth as an accent. and the paint chip sample were cut into squares and glitter glue added to secure them.


This FUN postcard has the words "highlighted" of You....sparkling!!  I think that anyone involved in this swap would have sparkling creativity and it should be acknowledged!


I was happy to see that these two cards are quite similar, so it would be easy to put them here together.

As you might expect by now....I used:


  • Paper slice from an unwanted book
  • re-used and painted dryer sheet
  • paper punch cut outs from an old magazine
  • sticky glitter paper
  • purchased lacy stamp
  • handmade white erasure stamp from the dollar store - FUN
  • handmade "artist tape" in yellow
  • used for mark making: soda pop bottle cap, the end of a paint brush and hot coffee sleeve
  • sliver of a paint chip sample
  • washi tape purchased from Etsy
Most important of all.....I had FUN!!!!  Summer is all about fun since our summer is so short!

Wednesday, July 25, 2012

Postcard #5

I can't believe it but I found some extra photographs of the postcards that I mailed away.

I really do need to "get on it" and follow through on photo taking.

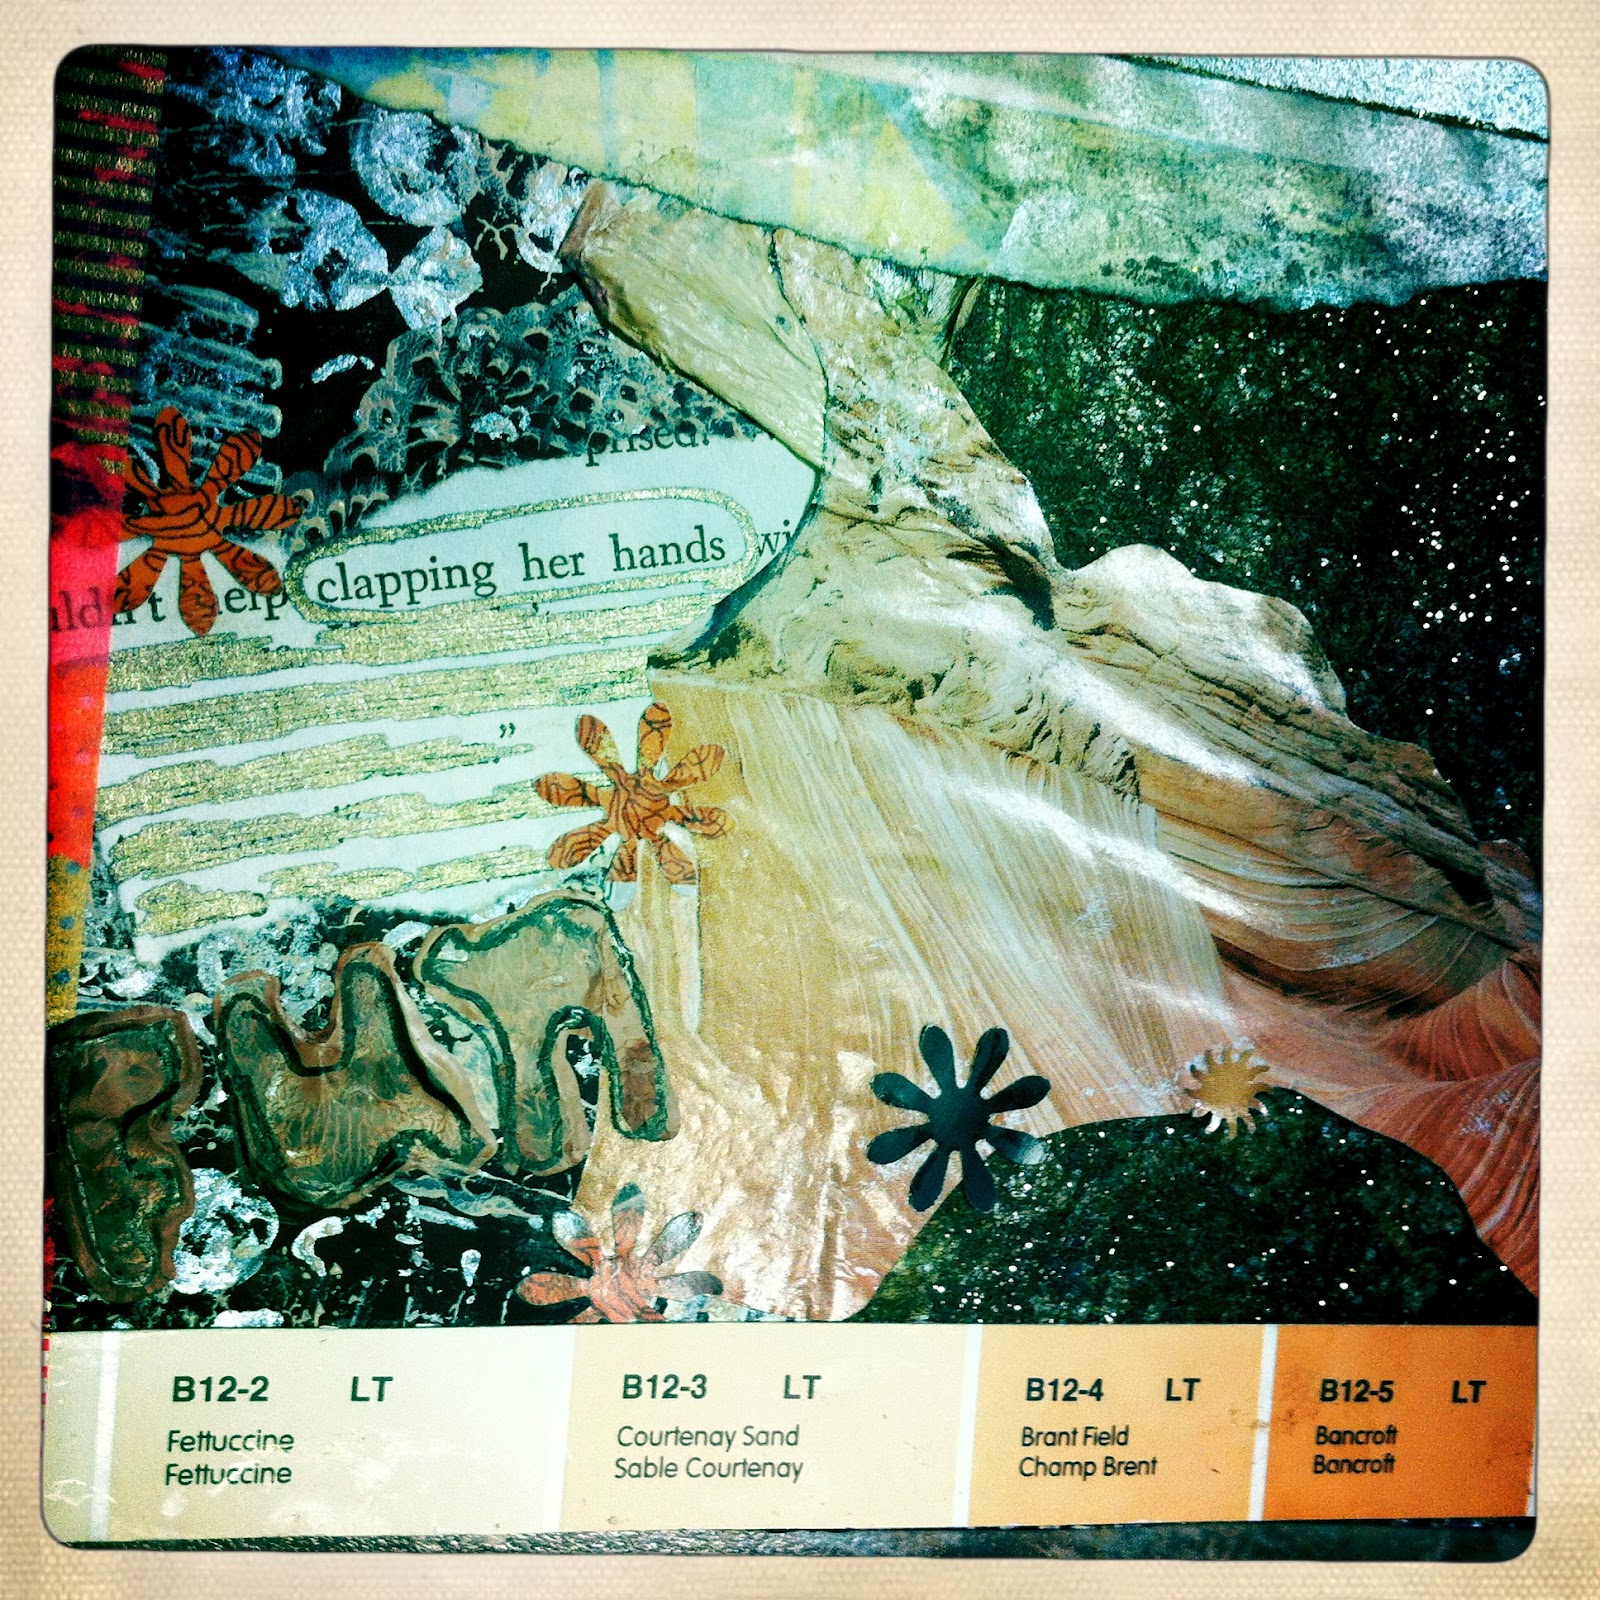
So here is another rusty orangey one:


  • I used a recycled junk mail card
  • painted and glittered used dryer sheet
  • old unloved book page
  • magazine image
  • paint chip sample
  • other bits of distressed magazine
  • punch cut pieces from old magazines
  • washi tape purchased on Etsy 


I took a pen and cancelled a bunch of the text and was left with "clapping her hands"!  I love that image!  It is what my little 7 month old grand-daughter does! 


Hmmmm, the magazine image rippled somewhat when I pasted it to the card.  Not happy about it but it looked better in person that in this photo!


I love the theme.....it was FUN!!!!


Tuesday, July 24, 2012

Postcard Swap Envelopes

I just received a very nice comment from one of the recipient s of my postcards.  I just realized that I have not been very diligent at taking photographs of my cards.  I was so intent on getting them out because I was sending them out "past due".  Oh well, I don't think the recipients will be upset over that!

 I love mail, or at least, this type of mail and love going to my mailbox to look and see and be "surprised"!  I am so happy that I have just received my tenth and final card yesterday!


Here is a snap of some of the envelopes.  I didn't want to send out the usual morning white type and really enjoyed making these out of stuff from around the house.  I have way too much gift wrap so it made great envelope material.  I also got to use up some of the brown paper bags that I seem to be accumulating.  I found some cheap tape so I trimmed the paper bag envelopes with that!  So much fun!


I especially enjoy the connection of other people from around the world.  I hope to get a comment on here from Germany.  Now that would be very cool!!!

Monday, July 16, 2012

Postcard #4 - Hot, Hot, Hot

Oh my it is just so steamy these days and tomorrow is suppose to be around 29!  Ouch!!

So here is another of my postcards that epitomizes the season!!


I like the square vintage format of the snap above but actually the postcard is much larger so I was forced to take a full sized one too.


I love hot pink and black together.

To make this postcard I used:


  • junk mail card
  • acrylic gesso and paint
  • strip of paper from old unwanted book
  • strip from a colour swatch
  • purchased lace stamp
  • handmade white erasure stamps: HOT and FUN
  • mark making with stuff from around the house - corrugated cardboard hot coffee sleeve
  • hand made "artist" tape using painted and stamped paper bandage tape
  • paper punched cut out out shapes from magazines
  • old bingo sheet
I have circled the words IMAGINE IT!  I think that it is something that we all need to do...imagine it!  Imagine....Hot.....Fun!!!


This too was fun to make!  My cards from the swap have come and I have gotten almost all but I seem to cap off at 8 out of 10 postcards.  

Friday, July 6, 2012

Postcar #3 Part 2-Rose Collage


First, there was a bunch of rose flowers on our florabunda rosebush!!!! My hubby has the green thumb in this family.  I like to take photographs and that is about it!!!


I had a chance to grab some petals that had fallen off in the wind.  I put them on a release paper sheet, actually re-used the wrapper that our photocopy paper comes in at work.  I often drag them home to use for art projects!!  The girls at work think that I am odd, but that is okay with me!


I didn't wait for the petals to dry; I just applied gel medium on them right away.  I think I used fluid matte medium to be exact.  I coated one side and then the other.  I did dry some others that I had picked and I will see how them are in a similar project.  I think I rather like the petal this way since they are not exactly flat and creates visual texture.

You can see them on the right edge of the photo below.  I just used more gel medium to apply them to the postcard.

So for this rest of the postcard I used:

  • applied black gesso to a re-cycled junk mail postcard
  • re-used a sewing pattern and seam binding from past projects
  • bingo sheet
  • paint colour swatch
  • painted and glittered dryer sheet
  • stamps made from around the house items


I also used one purchased lace patterned stamp that is in behind the sepia coloured dryer sheet.  In addition, on the top left you can just see a piece of paper cut from a magazine of something looking like  zebra's.  The image was distressed so not much of the image is really left but just the right amount for this project.


Although it had been my intention to stamp FUN on each postcard; because they were fun to make, I decided to omit that from this one.  I like a bit of busy or should I say "organized chaos" but there is a point of no return.   I just knew that I wold not be happy.

Oh, I just wanted to mention that I got a nice comment from a woman out in the worldwide web!  Nice comments are always great to receive.  Who know that a woman from the U.S. would  1. find my blog and 2. take the time to comment!!!  Thanks to all who do, I appreciate it!


Sunday, July 1, 2012

Happy Canada Day!!

I have been a bit negligent with this blog so I will endevour to keep up as much as I can this month!!

We were busy at work last night but not really as busy as I had anticipated!  Regardless, I am glad that I am not working overtime again tonight!

I was able to complete a mixed media "doodle" of sorts especially for the occasion!  This is certainly not my favourite doodles for Canada Day but it is the one that I did this year ..... so be it, here it is!!!

 I had fun doing this doodle because it kept me awake during the slow times.  I had some cheap dollar store tape with me and so I used it as a border.  The stuff is so awful that it is hard to remove it from the roll in one piece.....so, I just "went with it"!!!! 


Then when I came home this morning, I was resting in my car after working all night and glanced out the window.  This is what I am calling my Canada Day bunny!!!!  Very cute, almost as cute as my grand-daughter!